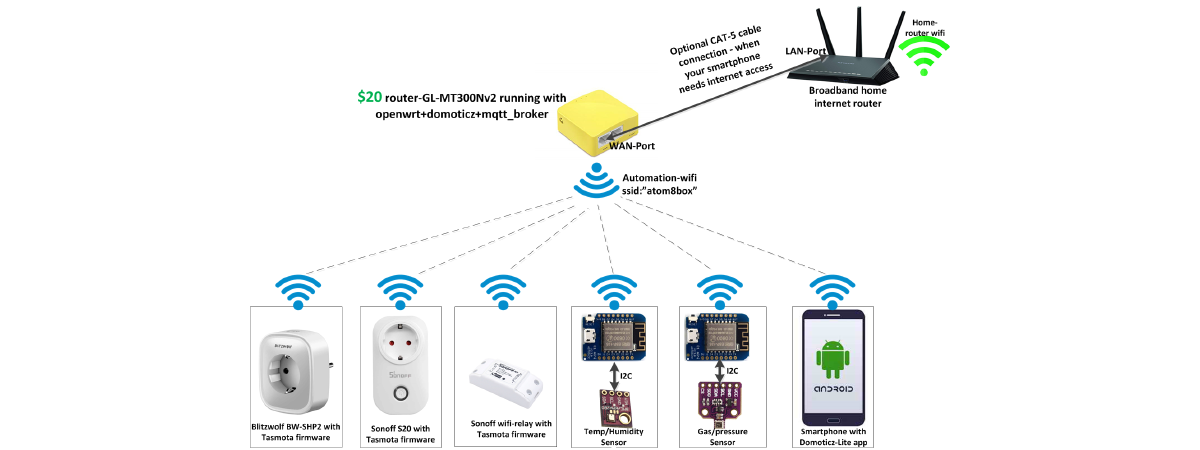

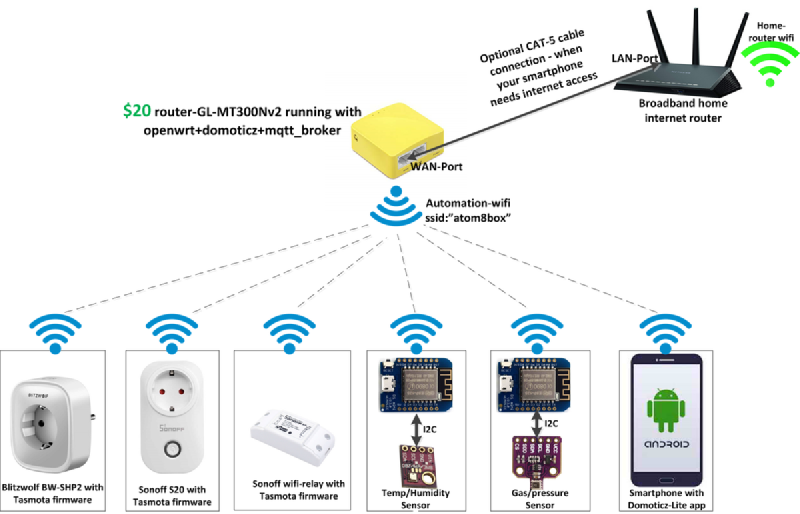
A custom OpenWrt firmware (autom8box) that packs router + Domoticz server + MQTT broker into an all-in-one home automation gateway running on a ~$20 off-the-shelf GL-MT300N-V2 pocket router.
The problem #
Wi-Fi based home automation products are cheaper than Zigbee or Z-Wave, but they typically require internet connectivity. Letting cloud servers control your home devices is not ideal — internet should be optional, not mandatory.
Thanks to the open-source community (Tasmota, ESPurna, etc.) for helping jailbreak devices like Sonoff, Blitzwolf, and Teckin. But jailbreaking solves only part of the problem — you still need a home automation gateway: Wi-Fi access point + MQTT broker + automation server (Domoticz, OpenHAB, etc.).
What autom8box provides #
- Wi-Fi access point — dedicated network for your IoT devices
- DHCP and DNS server — automatic network configuration
- MQTT broker (Mosquitto) — message bus for IoT devices
- Domoticz — home automation dashboard and rules engine
Limitations: Limited Wi-Fi range and a reduced set of Domoticz plugins due to the 16 MB flash limit. But it’s a good starting point for low-budget home automation.
Flashing steps #
Step 1 — Download autom8box-mt300nv2.bin.
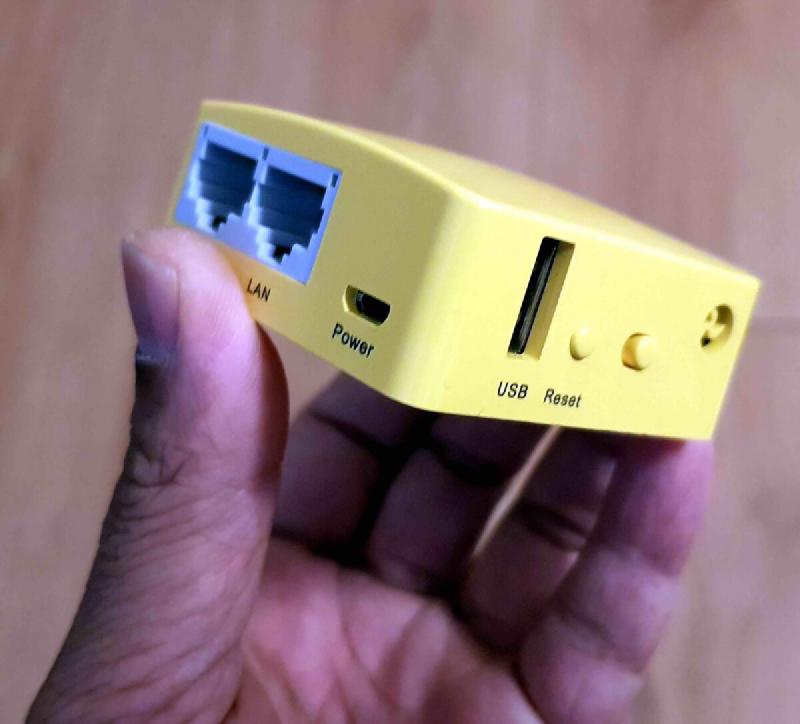
Step 2 — Power on the GL-MT300N-V2 and wait for its SSID to appear (shown as GL-MT300N-V2-xxx).
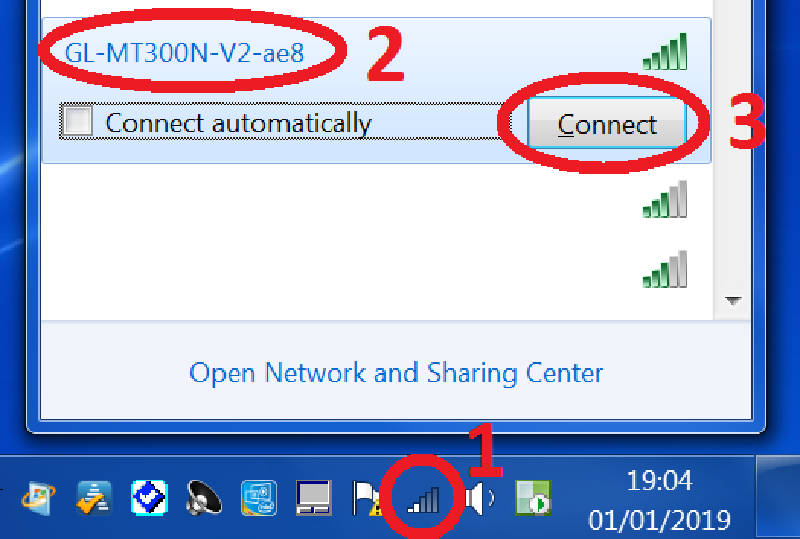
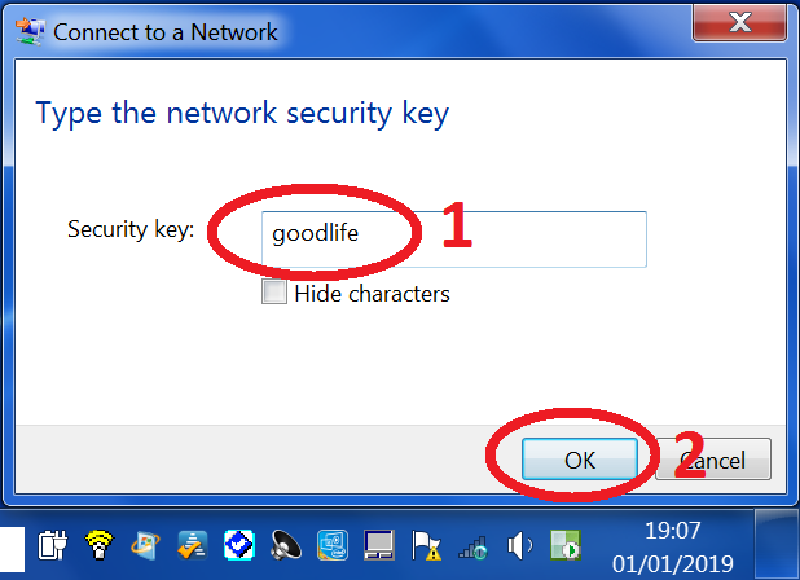
Step 3 — Connect to the SSID. When prompted for a password, enter goodlife (printed on the device’s back sticker).
Step 4 — Once connected, you should see the confirmation message:
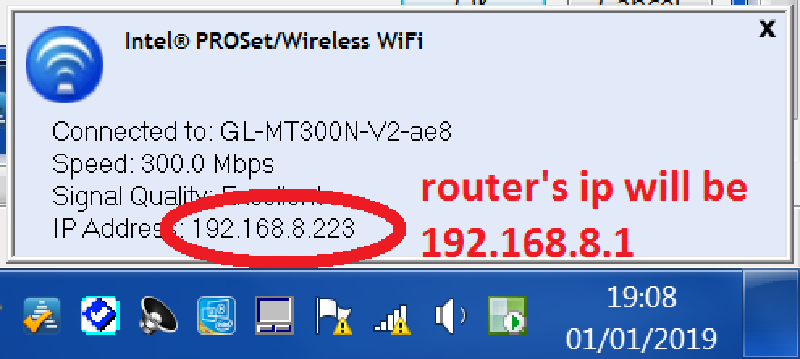
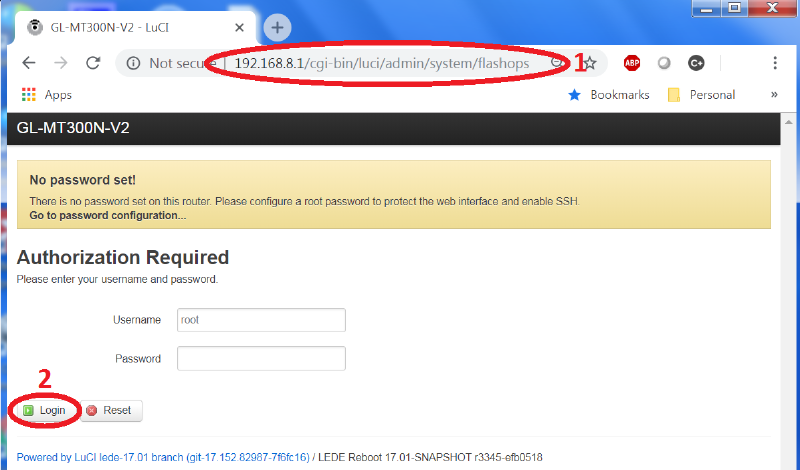
Step 5 — Open a browser and navigate to:
http://192.168.8.1/cgi-bin/luci/admin/system/flashops
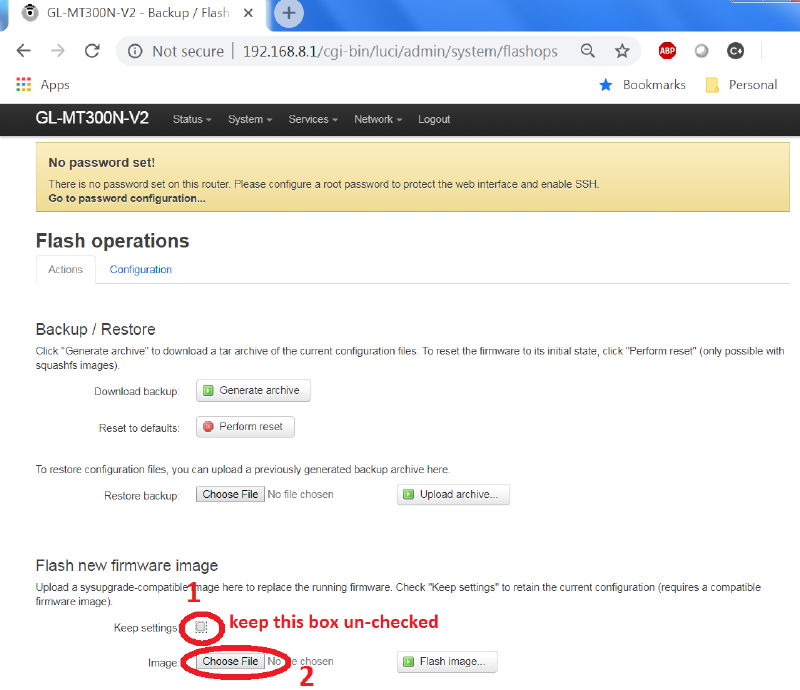
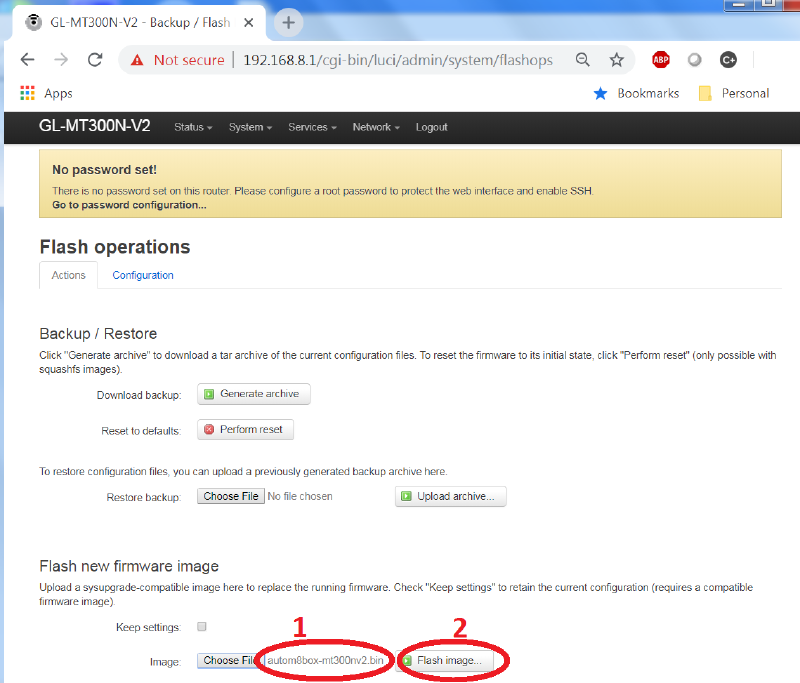
Step 6 — In the firmware update section, uncheck “Keep settings”, choose autom8box-mt300nv2.bin, then click “Flash Image”.
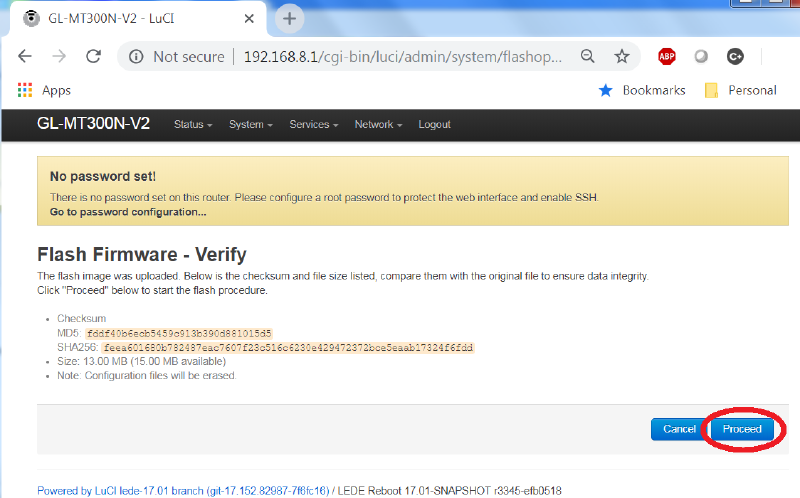
Step 7 — Click “Proceed” to confirm:
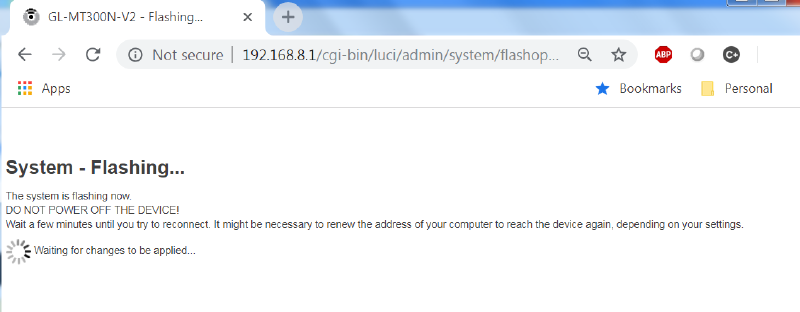
Step 8 — Wait about 2 minutes for the flash to complete:
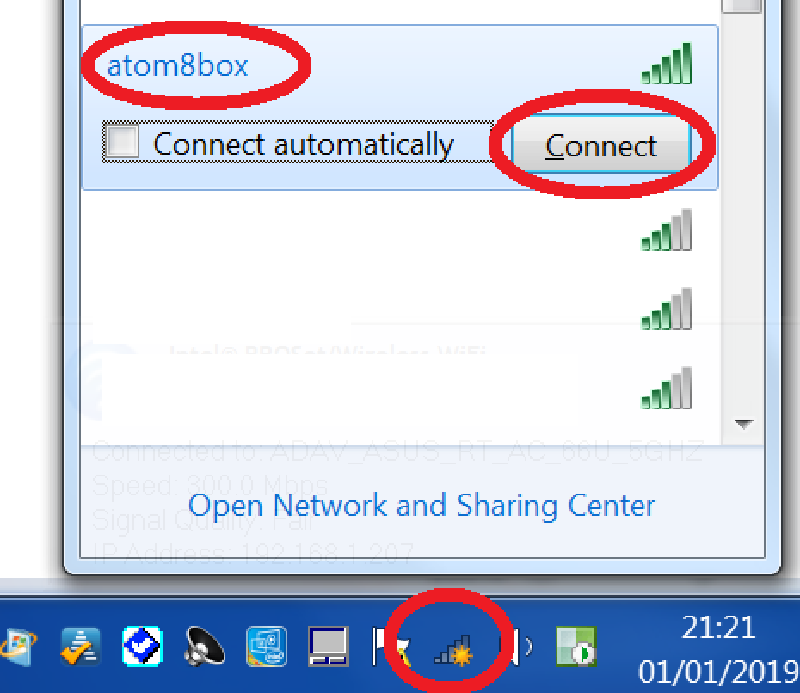
Step 9 — After reboot, a new SSID autom8box will appear. Connect with password goodlife.
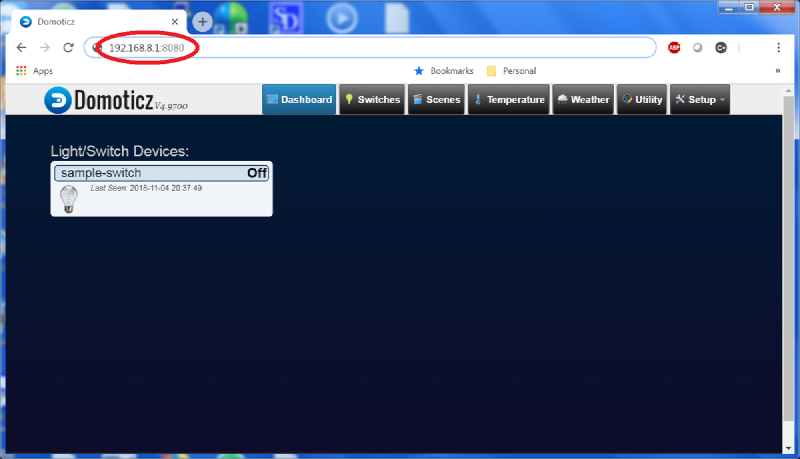
Step 10 — Open http://192.168.8.1:8080 in your browser — Domoticz is ready:
Post-setup security #
SSH credentials: user root, password goodlife
Change root password:
passwd rootChange Wi-Fi password:
uci set wireless.default_radio0.key=my-new-password
uci commit wireless
wifi
Change SSID:
uci set wireless.default_radio0.ssid=my-new-ssid
uci commit wireless
wifiImportant: autom8box does not auto-save the Domoticz database. After configuring your devices, SSH in and run reboot — during reboot the database is saved from RAM to the persistent partition. A hard power cut without rebooting may lose your configuration.
github.com/hackboxguy/lede-a5v11