
Six simple steps to get an AWS IoT Device SDK demo running on a Raspberry Pi 4 — using a lightweight custom Linux image built with Buildroot (just under 25 MB).
Quick start #
- Download sdcard-pi4-aws-iot-demo.img.xz (~25 MB)
- Write the image to an SD card using Balena Etcher
- Unplug and re-plug the SD card so the boot partition appears on your PC
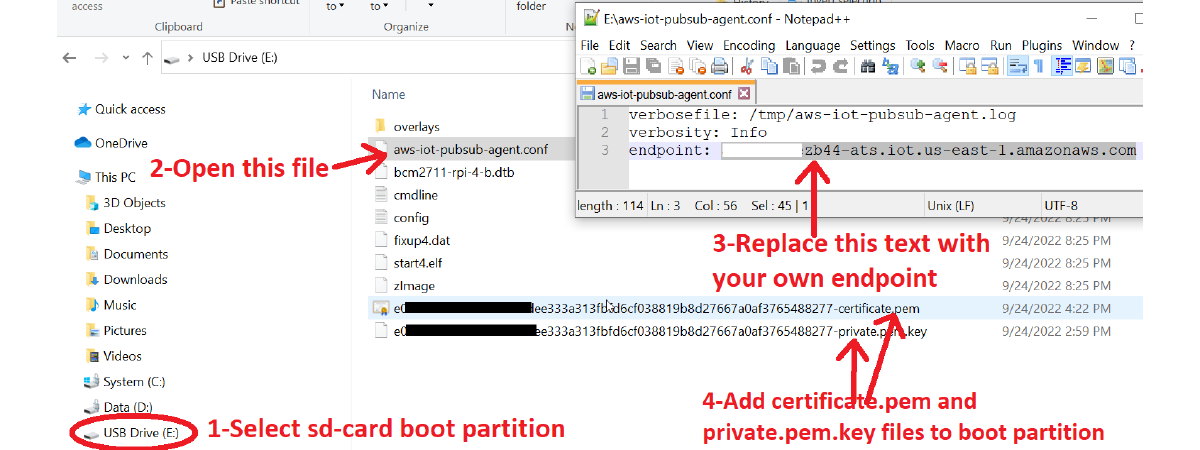
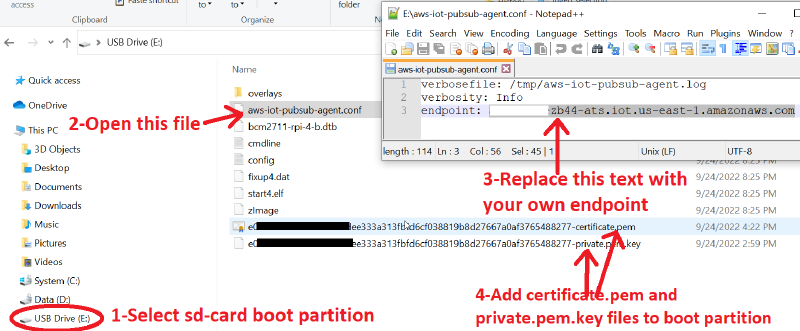
- Open
aws-iot-pubsub-agent.confand set your AWS IoT endpoint - Copy your AWS-generated device certificate (
xyz-certificate.pem) and private key (xyz-private.pem.key) to the boot partition - Insert the SD card into the Raspberry Pi 4, power on — the aws-iot-pubsub-agent will start publishing messages to your AWS IoT Core
The following image shows steps 4, 5, and 6 in detail:
AWS cloud preparation #
Before booting the Pi, set up the following on console.aws.amazon.com:
- Create an AWS IoT account (payment details required even for the free tier)
- Navigate to IoT Core
- Go to Manage → All Devices → Things → Create Thing
- Download the device certificate and private key (copy these to the SD card boot partition as described in step 5 above)
- Go to Settings and note your Endpoint (needed for step 4 above)
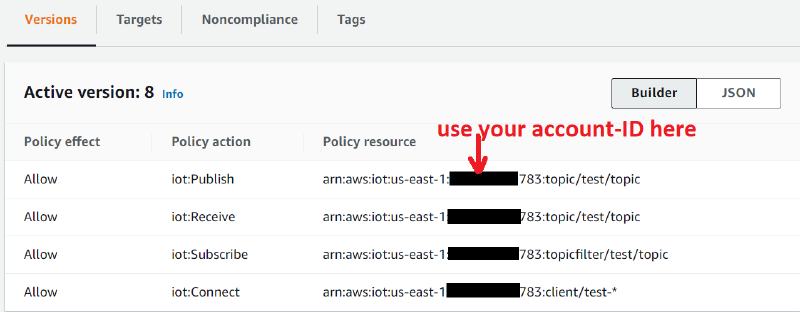
- Go to Security → Policies and create a policy with 4 entries as shown below:
Building the image from source #
Two commands to build the SD card image (detailed instructions in the git repository):
make -C buildroot BR2_EXTERNAL=../ BR2_DL_DIR=../../br-dl O=../../br-output raspberrypi4_aws_iot_defconfig
make -C buildroot BR2_EXTERNAL=../ BR2_DL_DIR=../../br-dl O=../../br-output
Buildroot customizations #
Key changes in the Raspberry Pi 4 Buildroot config for this AWS demo image:
- Enabled Dropbear SSH for remote debugging without monitor/keyboard
- Added Buildroot package for aws-iot-device-sdk-cpp-v2
- Added Buildroot package for aws-iot-pubsub-agent
- Enabled chrony for time sync (required for TLS handshake)
- Enabled SDK dependencies (host-cmake, libcurl, openssl, util-linux)
- Included
AmazonRootCA1.pemin/etc/ - Added
aws-iot-pubsub-agent.confto rootfs for the agent startup script - Added
/etc/init.d/S03MountBootto mount the boot partition at/mnt/certs(contains certificates, key, and config) - Included startup script for aws-iot-pubsub-agent
After booting #
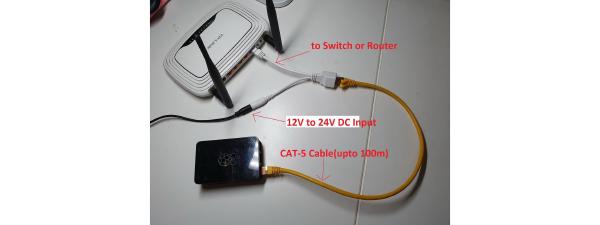
- Connect the Raspberry Pi 4 to a DHCP network with internet access
- Find the Pi on your network using hostname
buildrootor its assigned IP - Log in via SSH:
ssh root@192.168.x.y(password:brb0x) - Check the publish log:
cat /tmp/aws-iot-pubsub-agent.log - To modify the aws-iot-pubsub-agent code, see how to cross-compile and run on target
Note
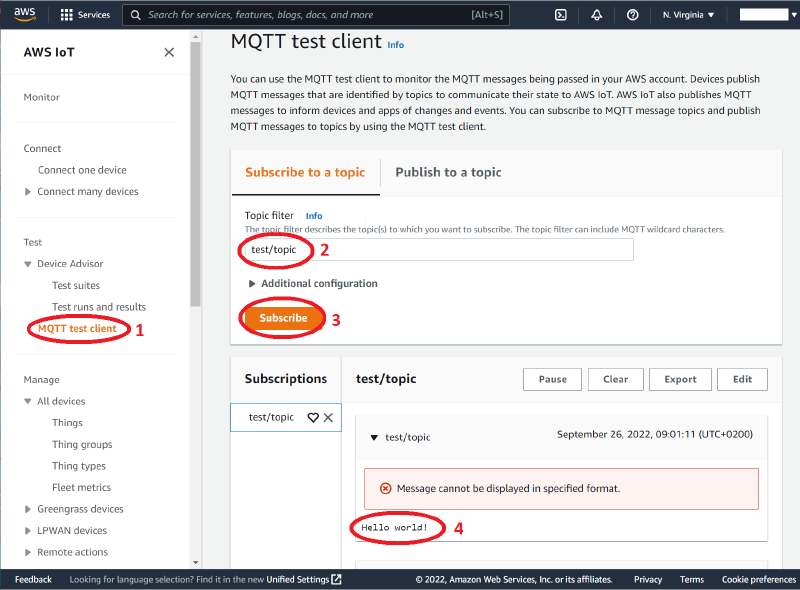
If everything is configured correctly (SD card and AWS security policies), Hello World! messages will appear on your AWS IoT Core console:
github.com/hackboxguy/br-wrapper
sdcard-pi4-aws-iot-demo.img.xz