
This guide shows how to build a small USB dongle that plays the Chrome Dino game automatically. The device appears as a standard USB keyboard, reads two light sensors on the monitor, and sends jump/duck keys with speed-adaptive timing. No browser extension, no host script, and no mechanical key press hardware.
Why this approach #
Common Dino bot methods have tradeoffs:
| Approach | Typical drawback |
|---|---|
| JavaScript injection | Browser-dependent and easy to detect |
| Servo or solenoid key presser | Bulky, noisy, mechanical wear |
| MCU + host-side Python script | Requires extra software running on the PC |
This design is fully self-contained: the host only sees a generic USB HID keyboard.
What is unique in this build #
Many Dino projects exist, but this implementation combines a few practical differences in one low-cost setup:
- No host software at runtime: the external MCU enumerates as a standard USB HID keyboard.
- No mechanical key press actuator: no servo/solenoid pressing the spacebar.
- Dual-obstacle handling: two vertically stacked LDR sensors support both jump and duck decisions.
- Speed adaptation in firmware: timing is derived from obstacle envelope width, so behavior stays usable as game speed increases.
Bill of materials #
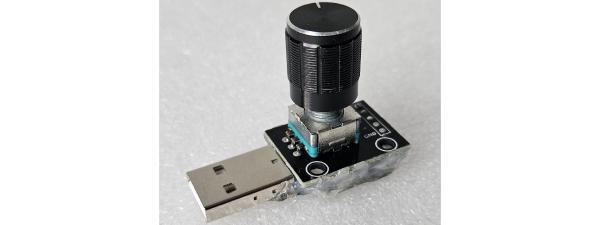
- Digispark ATtiny85 board (~2 to 5 USD)
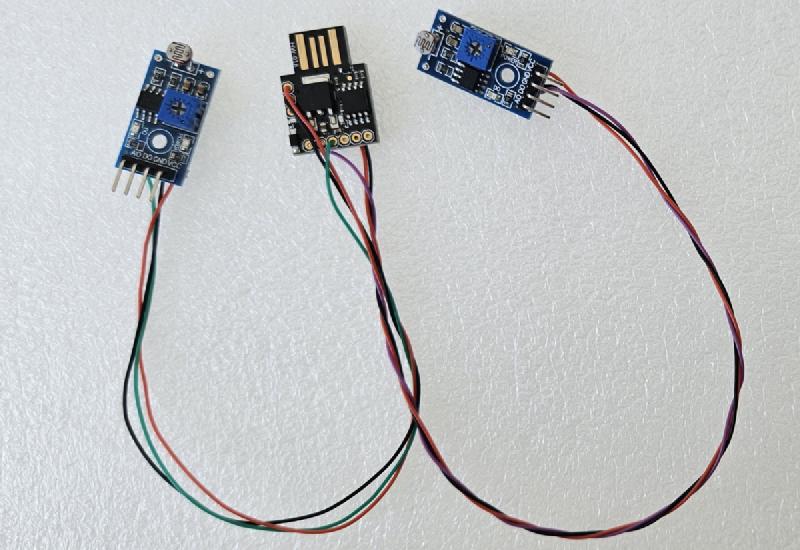
- 2x LM393 LDR comparator modules (~1 USD each)
- Jumper wires (~1 USD)
- Tape or small clip mount for sensor placement on the monitor
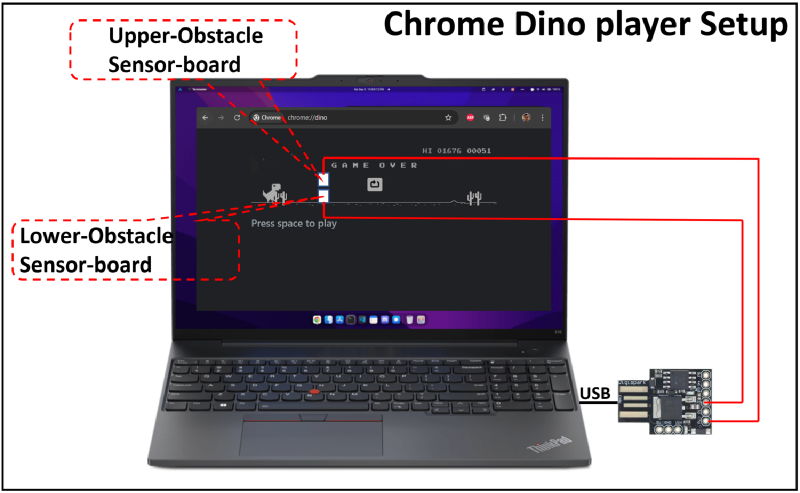
System overview #
- Lower sensor tracks ground-level obstacles (cactus zone)
- Upper sensor tracks bird-height obstacles
- ATtiny85 classifies obstacle type and sends key press over USB HID
- Lower sensor pulse envelope width is used to estimate game speed
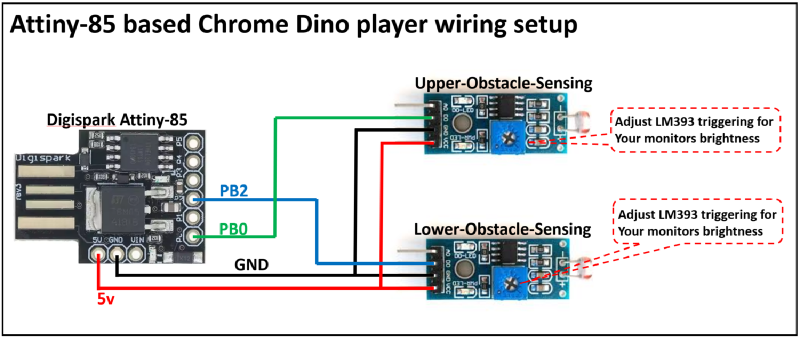
Wiring #
| LM393 pin | Digispark pin |
|---|---|
| Lower D0 | PB2 (D2) |
| Upper D0 | PB0 (D0) |
| VCC (both) | 5V |
| GND (both) | GND |
Build and flash #
Clone and build:
git clone https://github.com/hackboxguy/chrome-dinoplayer.git
cd chrome-dinoplayer
make all
Flash with Micronucleus bootloader:
make uploadIf your udev setup does not need sudo:
make upload SUDO=''Run make upload first, then plug in the Digispark when prompted.
Build prerequisites (Debian/Ubuntu):
sudo apt install gcc-avr avr-libc libusb-1.0-0-dev pkg-configQuick start (pre-built firmware already in repo):
make micronucleus
sudo tools/micronucleus/micronucleus --run hex/dino-player-v1.hex
Sensor placement and calibration #
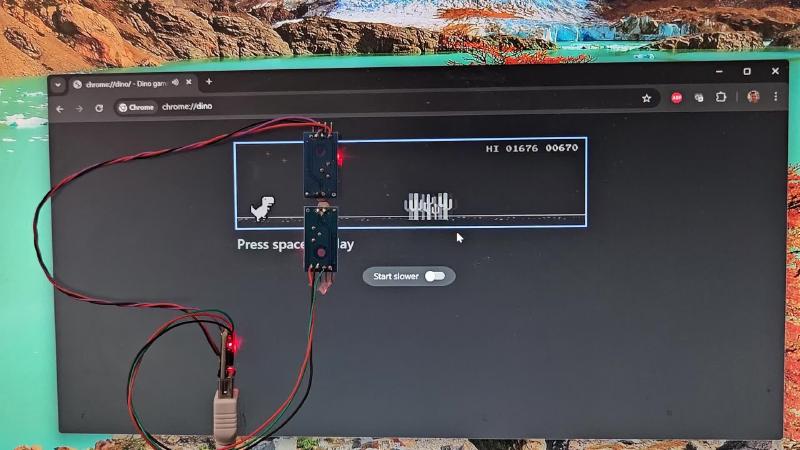
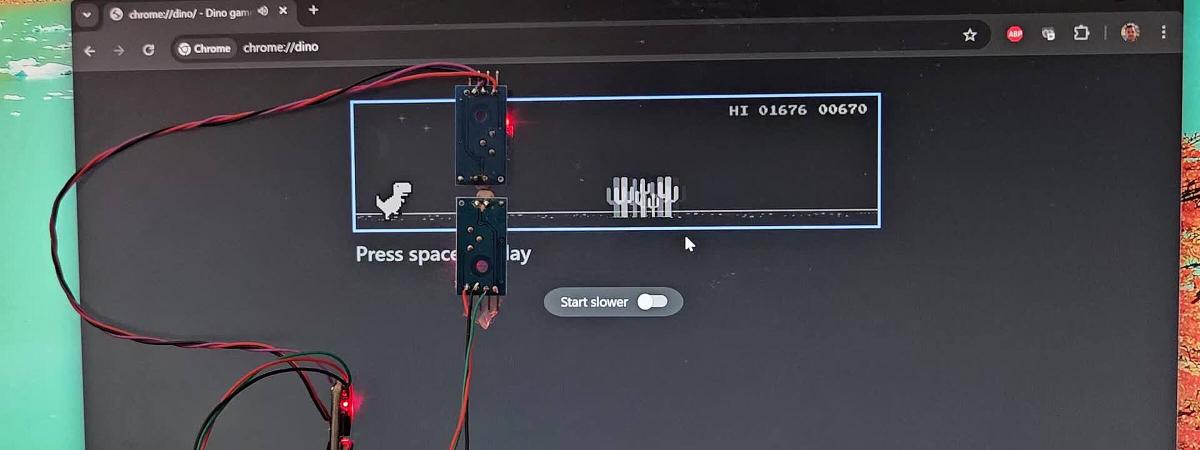
- Open
chrome://dinoand keep the game in day mode during setup. - Place both sensors at the same horizontal position, slightly ahead of the dino.
- Align lower sensor to cactus height.
- Align upper sensor to bird flight height.
- Adjust LM393 potentiometers so white background is “clear” and dark obstacle is “triggered”.
If your LM393 module polarity is inverted, change OBSTACLE_IS_LOW in firmware.
Key success considerations #
Two setup points decide whether the bot actually plays well or fails randomly:
- Vertical sensor alignment: keep both sensors at the same horizontal X position, with lower aligned to cactus zone and upper aligned to bird zone.
- Distance from dino (tested setup): in my build, the sensor pair works best at about 30 mm to 40 mm ahead of the dino (to the right), which provides enough lead time for action.
- Per-monitor potentiometer tuning: tune each LM393 threshold based on your monitor brightness/contrast and ambient light. A setting that works on one display or room lighting may fail on another.
After initial tuning, test at least 20 to 30 obstacle events and fine-adjust the potentiometers in small steps for faster and cleaner trigger transitions.
Detection logic #
The two vertically stacked sensors produce a simple decision table:
| Lower | Upper | Action |
|---|---|---|
| Triggered | Triggered | Jump (space) |
| Triggered | Clear | Jump (space) |
| Clear | Triggered | Duck (down arrow) |
| Clear | Clear | No action |
Rule used in firmware:
- Upper triggered without lower -> duck
- Any lower trigger -> jump
Adaptive speed timing (envelope tracking) #
Game speed increases over time. Fixed delay becomes inaccurate, so firmware tracks the lower-sensor obstacle envelope width and adapts jump timing.
- Fork gaps inside cactus shapes are merged using a short gap threshold
- Recent envelope widths are stored in a rolling window
- Rolling minimum is used as a stable speed reference
- Jump delay is scaled and clamped between min/max bounds
jump_delay = clamp(rolling_min * scale_factor, MIN_JUMP_DELAY, MAX_JUMP_DELAY)This keeps timing usable from early game to high score speeds.
Disable day/night inversion in Chrome #
Night mode flips contrast and can cause false triggers with LDR-based detection. In DevTools Console, run:
Runner.getInstance().invert = function(reset) {};Run this after each game restart because the function is reset on reload.
Useful tuning constants #
All values are in src/main.c:
| Constant | Default | Purpose |
|---|---|---|
KEY_HOLD_MS |
80 |
Jump key hold duration |
DUCK_HOLD_MS |
200 |
Duck key hold duration |
COOLDOWN_MS |
400 |
Minimum time between actions |
GAP_THRESHOLD_MS |
30 |
Merge short gaps inside one obstacle envelope |
ENVELOPE_HISTORY |
5 |
Rolling window size for speed estimate |
MIN_JUMP_DELAY |
10 |
Lower bound for adaptive jump delay |
MAX_JUMP_DELAY |
150 |
Upper bound for adaptive jump delay |
Troubleshooting #
- Device not detected as keyboard: check USB cable/port and Digispark bootloader state.
- Random jumps or ducks: re-tune LM393 thresholds and re-check sensor alignment.
- Missed obstacles at high speed: reduce
MAX_JUMP_DELAYor tweak scale factor. - Build failure: install AVR toolchain and libusb development package.
Where this is useful #
- USB gadget experimentation with ATtiny85 and V-USB
- Low-cost embedded vision-by-threshold prototypes
- Hardware-only input automation projects